Deinterlacing Content with Bitmovin Encoding
Introduction
Monitors of digital playback devices such as computers or smartphones display videos in Progressive mode, which means each frame is displayed as one pixel row after the other.
Older analog devices such as CRTs display videos in Interlaced mode. This means, each frame is divided into two fields. One field contains the odd-numbered pixel rows (1, 3, 5, ...) and the other field contains the even-numbered pixel rows (2, 4, 6, ...). When it was introduced 70 years ago (primarily for television video formats like NTSC and PAL), Interlacing reduced flicker and provided well distributed brightness on the screen. With today's digital screens this is no longer necessary.
Many cameras and equipment still support the interlaced format and thus, many source files contain interlaced video (e.g., if your source files originate from a broadcast playout system, there is a high chance that they may still be interlaced).
Interlaced files are labeled with an "i" for the frame rate, e.g.
| 1080i/25 (or 1080i50) | 1080p/25 (or 1080p25) |
|---|---|
| video of 1080 pixels height with 25 interlaced frames (=50 fields) per second | video of 1080 pixels height with 25 progressive frames per second |
When encoding interlaced video into Progressive mode, the encoder must construct each frame from two fields.
Typically however, the fields have been recorded separately, which means that two consecutive fields show the image with a time difference of double the frame rate (e.g. 1/50 second). Especially when the video contains fast movement, this results in undesirable artifacts known as "the comb effect" where the odd and even pixel rows are clearly visible in the frame. The result is a blurry video quality.
| Interlaced Picture | De-interlaced picture |
|---|---|
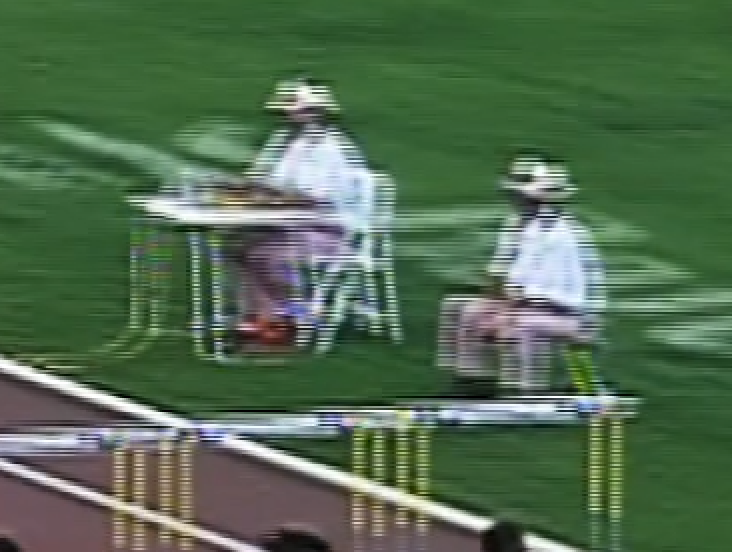 | 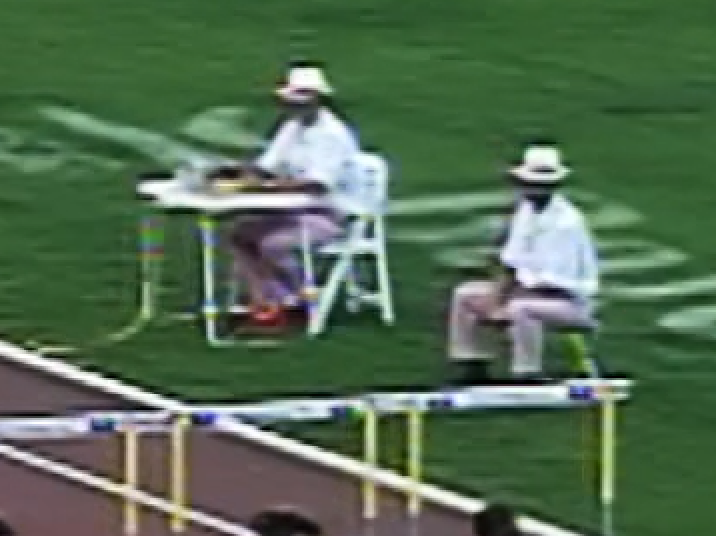 |
Thus, to remove the comb effect and improve video quality, Deinterlacing must be applied to the video before encoding. The Bitmovin Encoder includes a Deinterlacing filter which does exactly that.
Please note: If possible, check with your content provider if they can provide the sources as Progressive mode. They will be of better quality than deinterlaced even with the best filter.
The Deinterlacing Filter
The Deinterlacing filter's documentation can be found here: Create Deinterlace Filter
A Java SDK example that uses the Deinterlacing filter can be found here: https://github.com/bitmovin/bitmovin-api-sdk-examples/blob/master/java/src/main/java/Filters.java
The example is also available in other languages.
Using the Deinterlacing Filter
We assume that you worked with the Bitmovin examples before and know how to configure an encoding. If you are new to Bitmovin encoding, please refer to our tutorials such as Get started with the Bitmovin API and closely check the examples we provide in your preferred language: SDKs.
In the Filters.java example, after creating the video codec configuration
H264VideoConfiguration h264Config = createH264VideoConfig();
and after creating the video stream
Stream videoStream = createStream(encoding, input, inputFilePath, h264Config);
you need to apply the filters. You do this by creating a list of filters, adding all filters you need to this list, and applying the filter list to the video stream.
List<Filter> filters = new ArrayList<>();
(...)
filters.add(createDeinterlaceFilter());

createStreamFilterList(encoding, videoStream, filters);
The example shows the mechanism in the createStreamFilterList() function. In that function, a list of StreamFilter objects is created. Then, each filter is registered in a StreamFilter object and added to the list. Note that you can determine the order of the filters with the position parameter. At the end you create the filters and apply them to the stream and the encoding.
Configuring the Deinterlacing Filter
The most interesting function of the previous section is createDeinterlaceFilter() as it contains the configuration of the filter.
In the example however, this function is as simple as it can be:
private static DeinterlaceFilter createDeinterlaceFilter() throws BitmovinException {
  return bitmovinApi.encoding.filters.deinterlace.create(new DeinterlaceFilter());
}
Here, a default Deinterlace filter is created.
If you want to configure the Deinterlace filter differently than default, you can do it by altering the function:
private static DeinterlaceFilter createDeinterlaceFilter() throws BitmovinException {
    DeinterlaceFilter deinterlaceFilter = new DeinterlaceFilter();
    (...)
    return bitmovinApi.encoding.filters.deinterlace.create(deinterlaceFilter);
}
The (...) describes the place where you can set optional configurations.
The fields you can configure are:
- mode
- frameSelectionMode
- parity
- AutoEnable
Following the description of the fields in detail:
mode
deinterlaceFilter.setMode(DeinterlaceMode.FRAME);
| Value | Description |
|---|---|
| FRAME (default) | Output one frame for each frame (e.g. i50 will be encoded into p25) |
| FIELD | Output one frame for each field (e.g. i50 will be encoded into p50) |
| FRAME_NOSPATIAL | Like FRAME, but it skips the spatial interlacing check. |
| FIELD_NOSPATIAL | Like FIELD, but it skips the spatial interlacing check. |
frameSelectionMode
deinterlaceFilter.setFrameSelectionMode(DeinterlaceFrameSelectionMode.ALL);
| Value | Description |
|---|---|
| ALL (default) | Deinterlace all frames |
| INTERLACED | Only deinterlace frames marked as interlaced |
parity
deinterlaceFilter.setParity(PictureFieldParity.AUTO);
This sets the picture field parity assumed for the input interlaced video. As said above, in interlaced video streams a frame comprises of two fields. One includes the odd pixel rows (1, 3, 5,...). This is called the top field. The other includes the even pixel rows (2, 4, 6...) This is called the bottom field. When reconstructing a frame from a stream of alternating fields (top, bottom, top, bottom...), it is important to understand whether a frame starts with a top field or a bottom field.
| Value | Description |
|---|---|
| TOP_FIELD_FIRST | Assume the top field is first |
| BOTTOM_FIELD_FIRST | Assume the bottom field is first |
| AUTO (default) | Enable automatic detection of field parity. If the interlacing is unknown or the decoder does not export this information, top field first will be assumed. |
autoEnable
This value controls the application of the filter per se. With this comes in certain cases an alteration of some configured parameters.
The possible values of this field are:
- ALWAYS_ON (default)
- METADATA_BASED
- META_DATA_AND_CONTENT_BASED
deinterlaceFilter.setAutoEnable(DeinterlaceAutoEnable.ALWAYS_ON);
This table shows the consequences of each value
| Parameter | ALWAYS_ON | METADATA_BASED | META_DATA_AND_CONTENT_BASED |
|---|---|---|---|
| (the filter itself) | Deinterlacing will always be applied as configured | Deinterlacing might be removed depending on metadata probing | Deinterlacing might be removed depending on metadata probing and a content analysis. The content analysis is the backup solution if the meta data probing fails. |
| mode | not touched | not touched | not touched |
| frameSelectionMode | not touched | not touched | this is forced to ALL if the content analysis detects interlaced input |
| parity | not touched | if parity is AUTO then it will be overwritten with the result of the metadata probing | if parity is AUTO then the parity will be overwritten with the result of the metadata probing. However, if the content analysis detects interlacing then the parity will always be overwritten with the result of the analysis |
Advice for using autoEnable
- If you know exactly what your input is, and you know how to set mode, parity and other settings, then set autoEnable to
ALWAYS_ON(default). - If you don't, or want to allow for variable input files, then it's safest to use
META_DATA_AND_CONTENT_BASED. This may overwrite other settings if the source file analysis indicates a contradiction.
Updated 3 days ago