Using Simple S3 Output in the Dashboard
Overview
S3 role-based Inputs resp. S3 role-based Outputs are an alternative way for our services to access your AWS (Amazon Web Services) S3 bucket to be used as an Encoding Input and/or Output, or an Output for Analytics Exports.
Instead of you providing your AWS Access/Secret key pair to our Encoding or Analytics service, we provide you with an AWS IAM (Identity and Access Management) user name, which you can grant specific access rights in your account so it can access your desired S3 bucket.
In this tutorial, we will create an S3 bucket in your AWS account which will serve as the input or output storage for your encodings.
NOTE: This tutorial needs to be repeated for EACH account/sub-organization you want a S3-Role-Based access for.
Setting up these buckets consists of 3 main sections:
- S3 Bucket permissions: select or create a new S3 Bucket and ensure general security permissions match the Bitmovin requirements.
- Output creation in the Bitmovin UI: using the creation wizard create a new output using this S3 bucket and generate the policy.
- Update Policy and CORS: apply the generated policy to your S3 Bucket permission and ensure CORS is configured correctly for playback.
Requirements
- a Bitmovin account. Please make sure that you run this tutorial on the same Bitmovin account (and sub-organization, if applicable) that you want to use for production. If you don't have or know your production account yet, remember to repeat this tutorial later on your production account.
- an AWS account to create the input and/or output bucket and the
Rolethat allows the Bitmovin system to access that bucket. - S3 role-based buckets can be used for segmented outputs with encoder version 2.29.0 or higher.
Create an AWS S3 Bucket
In the AWS Management Console, open the S3 section.
-
Click on the Create Bucket button which starts the bucket creation wizard
-
In the "Name and Region" panel, choose a bucket name (for example my-bitmovin-bucket) and a Region (for example (EU) Ireland)), then press Next
-
Configure the Object Ownership depending on your needs
a. ACLs enabled, this is required if PUBLIC_ACCESS is configured for Encoding outputs. Encodings that are started in our Bitmovin Dashboard set the PUBLIC_ACCESS to enable preview playback.
b. ACLs disabled. If this policy is used, Encoding outputs need to be set to have the PRIVATE ACL.
-
Configure settings for playback
a. The default settings will Block all public access
b. To enable playback for manifests and files from the bucket, uncheck 🔳 Block all public access.
-
Complete the wizard and click click Create Bucket
Keep in mind that playing directly from an S3 bucket can be expensive, and a CDN endpoint is typically cheaper.
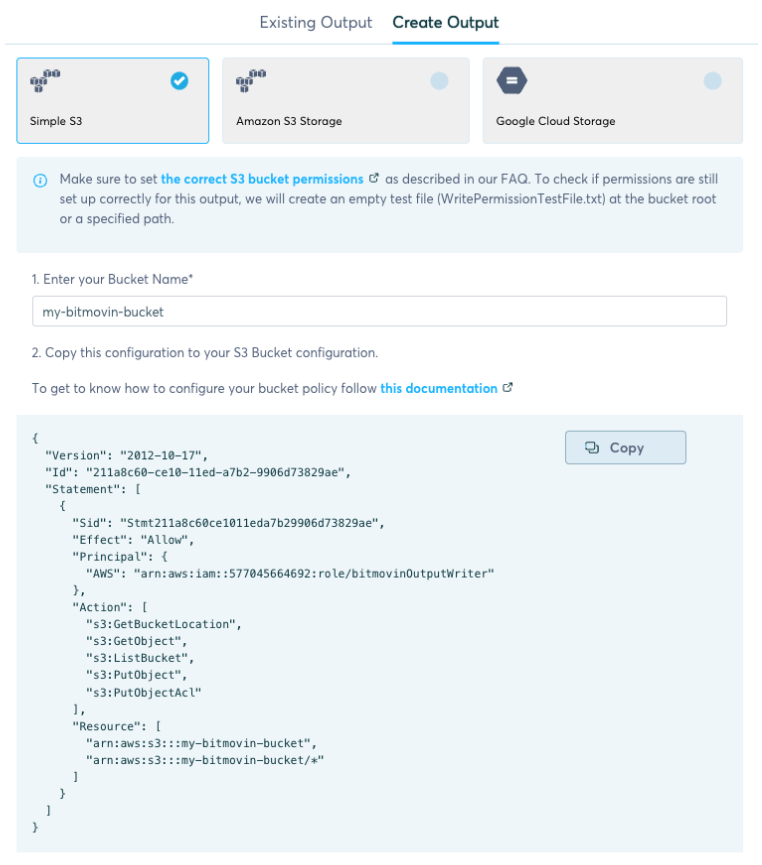
Dashboard wizard step
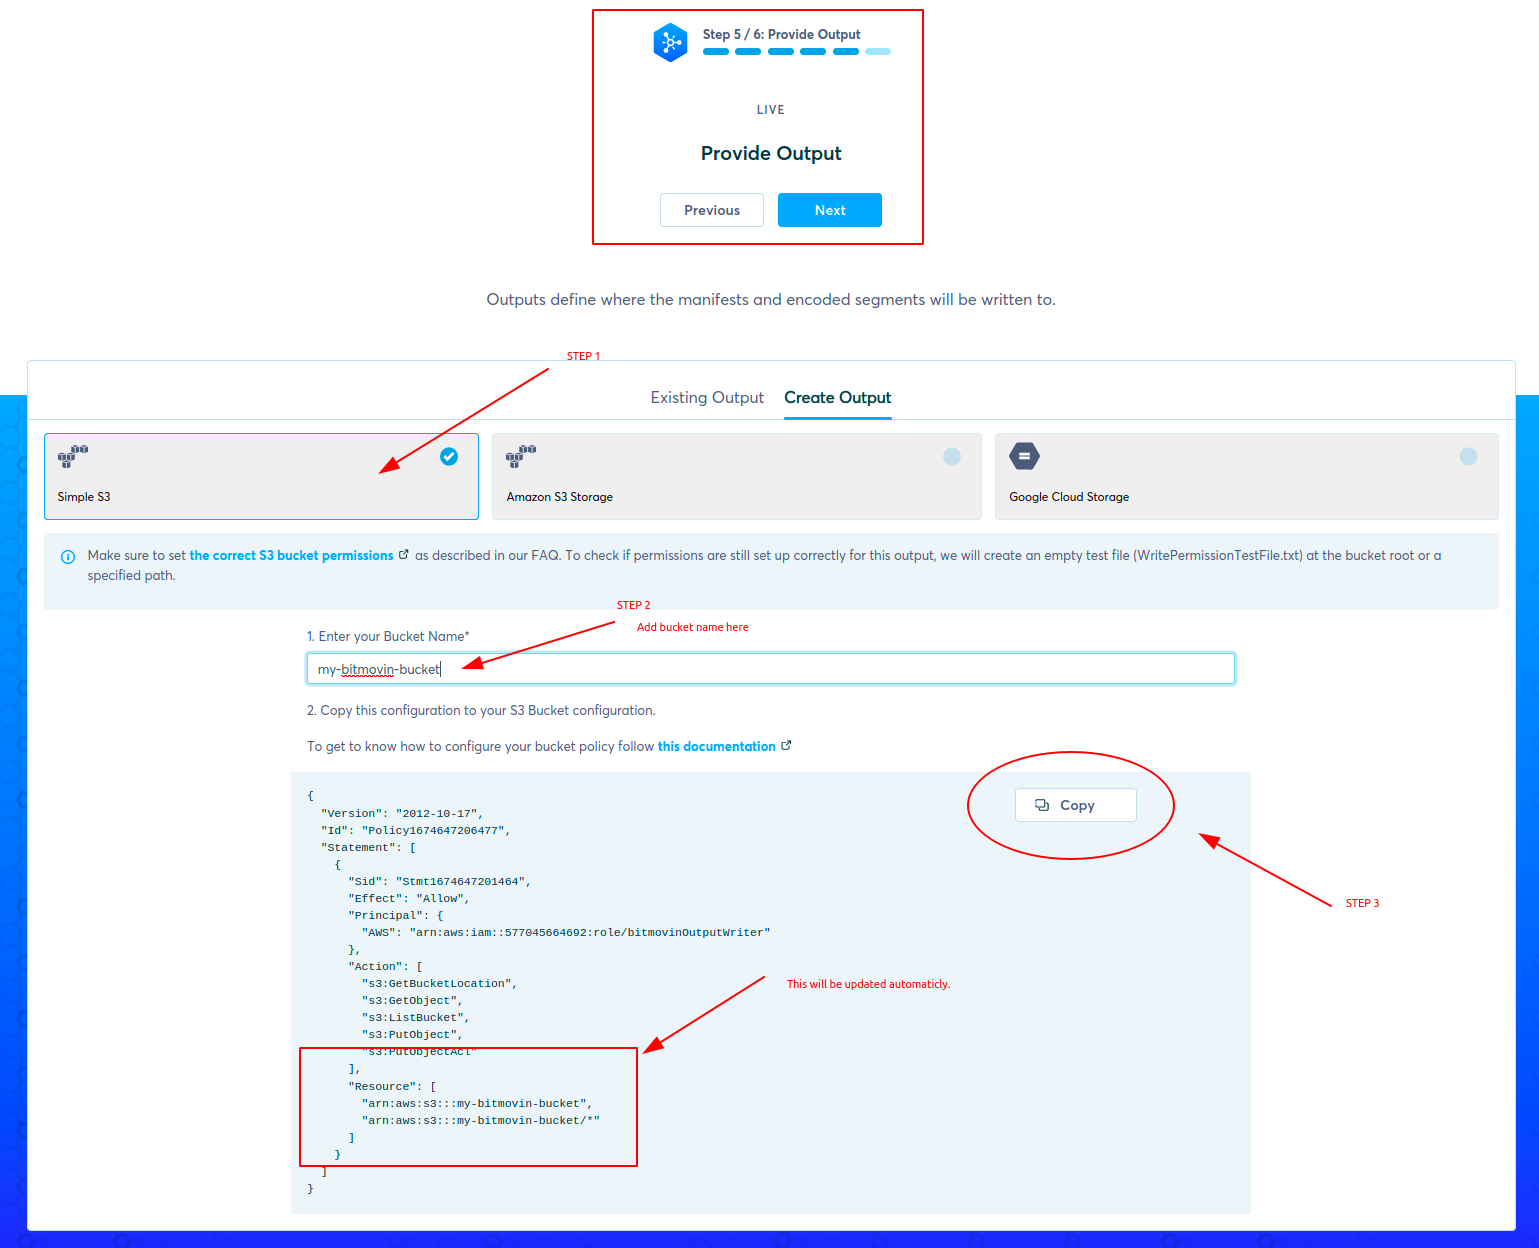
Update S3 Bucket Policy & CORS
In order to continue, you will have to update the Policies in your AWS account.
Make sure you have the AWS console open and have navigated to the S3 bucket permissions where the security settings were updated.

If you want to learn more about Policies in AWS, please see their documentation
NOTE: You will get JSON Payload by clicking copy button.
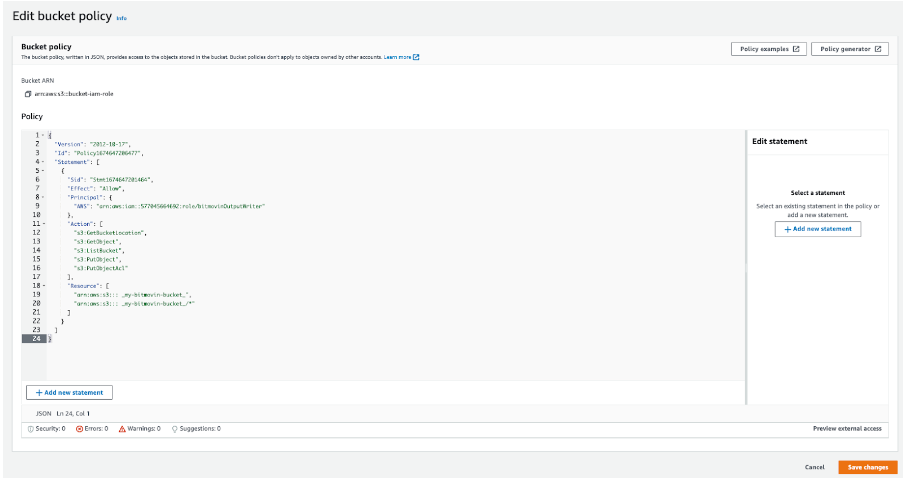
Applying the JSON to S3
Edit the bucket policy and paste the JSON file from the UI form to the Bucket.
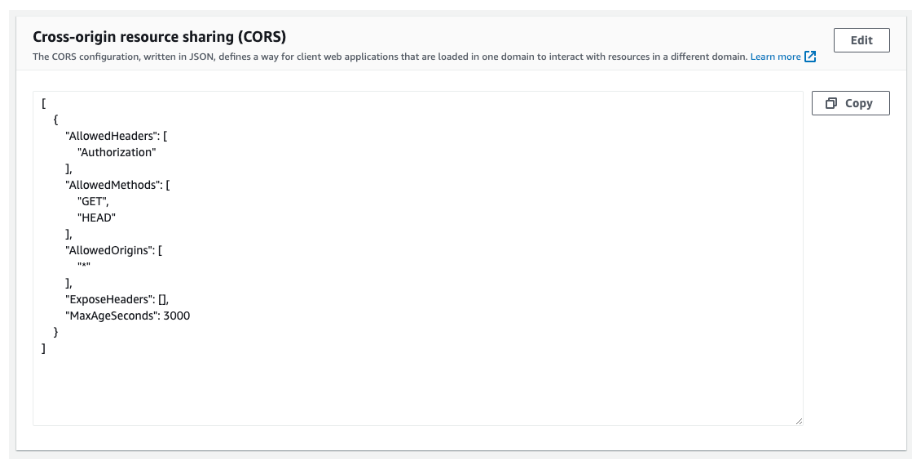
Updating the CORS
Also under the Permissions tab in the AWS console, update the CORS settings.
You can copy the JSON below.
[
    {
        "AllowedHeaders": [
            "Authorization"
        ],
        "AllowedMethods": [
            "GET",
            "HEAD"
        ],
        "AllowedOrigins": [
            "*"
        ],
        "ExposeHeaders": [],
        "MaxAgeSeconds": 3000
    }
]
Then edit the CORS policy and paste in the AWS Bucket, as shown in the image below.
Once created, these new S3 outputs will be available as Amazon S3 Role Based outputs.
Updated 6 months ago