Setting up SSO with Okta via SAML
This guide walks you through how to configure Single Sign-On (SSO) in Okta using the SAML 2.0 protocol to enable centralized authentication for your team in the Bitmovin Dashboard.
While this guide explains the integration with Okta in detail as an example, SSO via SAML 2.0 is not limited to Okta. Compatibility is provided with all SAML 2.0 providers (e.g. Azure AD, OneLogin, Oracle Identity Cloud Service).
Prerequisites
Before you begin, make sure you have:
- Administrator access to Okta
- Administrator privileges in your Bitmovin organization
Note: All Bitmovin organizations support SSO. However, only organization admins can set up or modify SSO settings.
Step 1: Create a SSO Organization in the Bitmovin Dashboard
-
Log in to the Bitmovin Dashboard.
-
Navigate to Organization Settings → SSO Configuration.
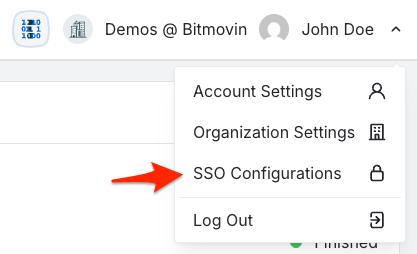
-
Click Add new SSO
-
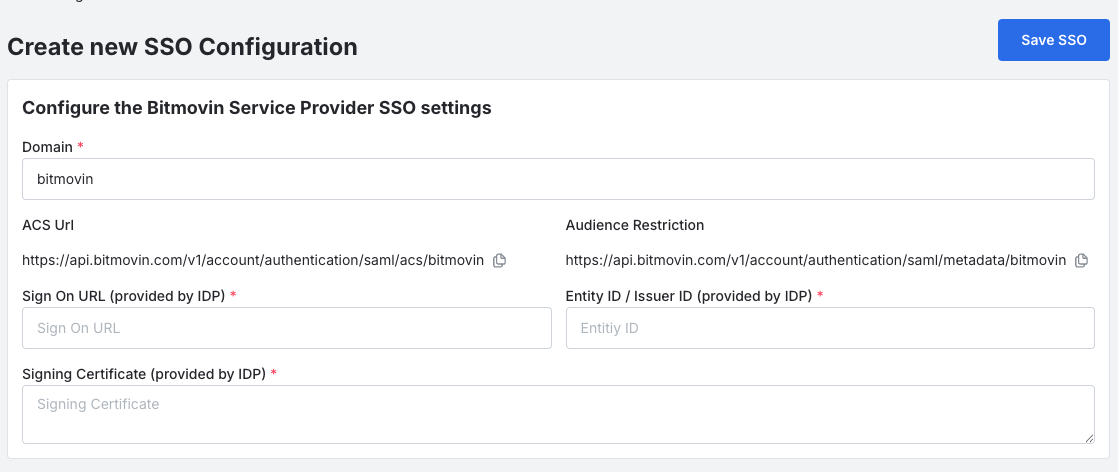
Enter a Domain you use for your organization (eg. Bitmovin)
- Bitmovin will generate the following values, which you’ll use in the Okta setup:
- ACS URL (Single Sign-On URL)
- Audience Restriction (Audience URI)
- Bitmovin will generate the following values, which you’ll use in the Okta setup:
Make note of these values or keep the tab open for reference in the next step.
Step 2: Create a New SAML Application in Okta
- Log in to the Okta Admin Console.
- Go to Applications → Applications.
- Click Create App Integration.
- Choose SAML 2.0, then click Next.
Step 3: Configure the SAML Settings in Okta
In the General Settings, choose a name like Bitmovin and optionally upload a logo.
Click Next, and enter the SAML configuration using the values from Step 1:
SAML Settings
| Field | Value |
|---|---|
| Single sign-on URL | Copy "ACL Url" from the Bitmovin Dashboard |
| Audience URI (SP Entity ID) | Copy "Audience Restriction" from the Bitmovin Dashboard |
| Application username |
Click Next, then Finish.
Step 5: Retrieve IdP Metadata from Okta
In the Okta application, open the Sign On tab.
- Click More details
- Copy the Single Sign-On URL and paste it into the Bitmovin Dashboard Sign On URL
- Copy the Issuer and paste it into the Bitmovin Dashboard
- Copy the Signing Certificate and paste it into the Bitmovin Dashboard
- Select which groups your new users should be automatically be added to under Configure the Bitmovin organization groups
- Click Save
Step 6: Test the Integration
- Log out of the Bitmovin Dashboard
- Visit your Okta My Application List and click the newly created Bitmovin App
- You should be automatically logged into the Bitmovin Dashboard
Optional Step 7: Configure your Organization Team
Once you’ve confirmed that SSO login works:
- Promote your SSO-based user to Organization Admin:
- Go to Organization Settings → Team.
- Locate your newly logged-in SSO user and assign them the Admin role.
- Remove non-SSO user accounts:
- To prevent login via email/password, remove all traditional (non-SSO) users from the team.
- This ensures all future logins go exclusively through Okta.
Be sure your SSO user has full admin rights before removing other admins.
FAQ
Required SAML Settings
The Bitmovin SAML SSO implementation requires the following things from an IDP:
nameIdneeds to be set to Email- Optional:
givennameandsurnamewill be use - **Assertions and Signatures need to be signed **with at least RSA_SHA256 as a signature algorithm and SHA256 as digest algorithm.
Just-in-Time (JIT) user provisioning
All users are provisioned through Just-In-Time Provisioning (JITP), meaning there is no need for prior setup or manual provisioning. Upon first login via SAML, users are automatically assigned the Role-Based Access Control (RBAC) permissions configured for the SSO Domain within the Bitmovin Dashboard. Typically, this means users receive a restricted default permission set. Administrators can subsequently grant additional permissions to specific users through the Bitmovin UI, as needed.
Sub Organizations
SSO Domains can only be created at the Root-Organisation level but SSO provisioned users can be granted access to any of the Sub-Organisations (also without having access to the Root-Organisation). Eg. a user can be automatically be added to a Read-Only group for a Sub-Organisation used for production workloads and full access to the Sub-Organisation that runs development and QA workloads.
Updated 6 months ago