Using Bitmovin Cloud Connect with OCI
This document explains how to set up Bitmovin Encoding on Oracle Cloud Infrastructure (OCI) so that the Bitmovin platform can run encoders using the OCI API.
The instructions in this document for the REST API Services apply to live encoding and file-based encoding. For a complete list of formats and input types, see here.
Prerequisites
Activation requiredThis feature requires a commercial agreement and needs to be specifically activated for a Bitmovin account, it is not available by default. You will not be able to complete the configuration below without this activation.
- A Bitmovin account enabled for usage of Cloud Connect
- If you want to use Cloud Connect with a sub organization, this sub organization must be enabled for usage of Cloud Connect
- An Oracle Cloud Infrastructure (OCI) account to run encodings in
Configure your OCI account
In this section, we will create the appropriate setup to enable Bitmovin's encoding platform to interact with your OCI infrastructure and run encoding jobs.
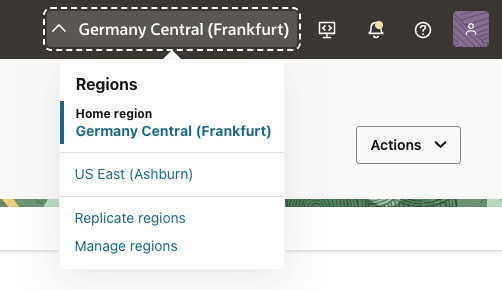
Select a Region
When logged-in to the OCI console, select the region in which you want to run encodings in. For each region you want to use for encodings, a separate set of region-specific resources (VCN, Subnet, Gateway, Route Tables, etc.) needs to be created. See this overview to learn more about region-specific and cross-region resources in OCI.
Set up a Compartment
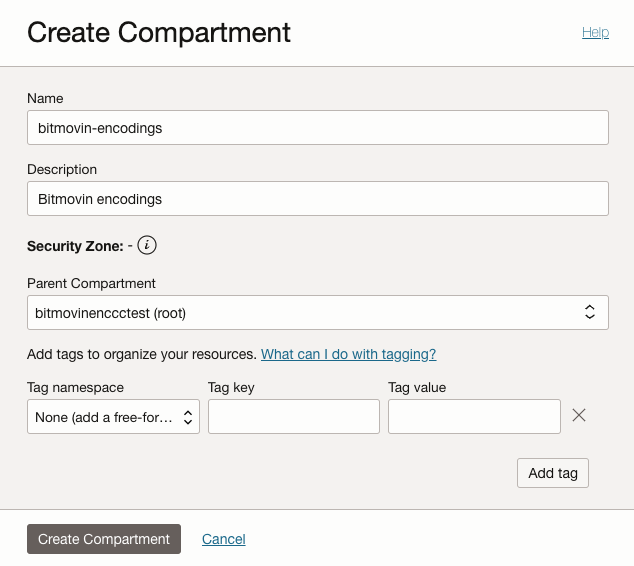
In your OCI tenancy, create a dedicated sub compartment in your tenancies root compartment, that will be used to run encoding VMs in ("Identity & Security" > "Compartments" > "Create Compartment"). It is highly recommended to not use the root compartment of your tenancy and to create a dedicated sub compartment for Bitmovin Encoding VMs.
It is also recommended to create a separate sub-compartment for each OCI infrastructure account object that is created on Bitmovin side. See section Link your OCI tenancy for details how to create those OCI infrastructure account objects.
Setup Admit Policy
Bitmovin’s OCI Cloud Connect feature relies on cross tenancy policies to allow Bitmovin to control resources in the customer tenancy. OCI cross tenancy policies consist of an endorsement and an admit policy. The endorsement policy is created automatically in Bitmovin’s own tenancy as soon as an infrastructure object is created (see Link your OCI tenancy).
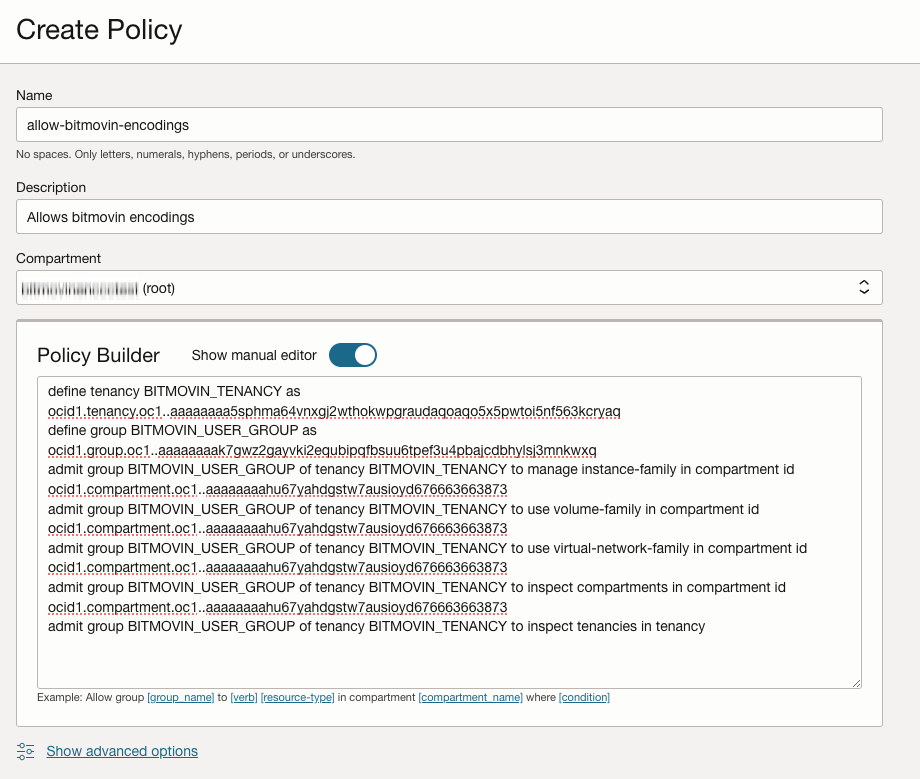
The admit policy needs to be created manually in the root-compartment of your tenancy. This can be done under "Identity & Security" > "Policies" > "Create Policy". Make sure the root compartment is selected when creating the policy.
The exact policy statements of the admit policy can be found below. Just copy and paste the statements into the policy editor (after switching to "Show manual editor") and make sure to replace <CUSTOMER-COMPARTMENT-ID> with the OCID of the compartment that was created in step Set up a Compartment.
BITMOVIN_TENANCYis the OCID of Bitmovin’s tenancyBITMOVIN_USER_GROUPis a group of users, defined in Bitmovin’s tenancy, that will be allowed to manager Encoder VM instances in the customer tenancy<CUSTOMER-COMPARTMENT-ID>needs to be replaced with the OCID of the compartment that was created in step Set up a Compartment.
define tenancy BITMOVIN_TENANCY as ocid1.tenancy.oc1..aaaaaaaa5sphma64vnxgj2wthokwpgraudaqoaqo5x5pwtoi5nf563kcryaq
define group BITMOVIN_USER_GROUP as ocid1.group.oc1..aaaaaaaak7gwz2gayvki2equbipqfbsuu6tpef3u4pbajcdbhylsj3mnkwxq
admit group BITMOVIN_USER_GROUP of tenancy BITMOVIN_TENANCY to manage instance-family in compartment id <CUSTOMER-COMPARTMENT-ID>
admit group BITMOVIN_USER_GROUP of tenancy BITMOVIN_TENANCY to use volume-family in compartment id <CUSTOMER-COMPARTMENT-ID>
admit group BITMOVIN_USER_GROUP of tenancy BITMOVIN_TENANCY to use virtual-network-family in compartment id <CUSTOMER-COMPARTMENT-ID>
admit group BITMOVIN_USER_GROUP of tenancy BITMOVIN_TENANCY to inspect compartments in compartment id <CUSTOMER-COMPARTMENT-ID>
admit group BITMOVIN_USER_GROUP of tenancy BITMOVIN_TENANCY to inspect tenancies in tenancy
Here’s an explanation of the purpose of each policy statement:
manage instance-family: To launch and terminate encoder instances.use volume-family: To attach volumes when launching encoder instances.use virtual-network-family: To configure VCNs and subnets for encoder instances.inspect compartments: To list availability domains.inspect tenancies: To list subscribed regions.
Please note that our policies use access level inspect and not read:
- inspect – Grants the ability to list and view basic metadata about a resource, but not its full details.
- read – Includes everything inspect allows, but also lets you view more detailed information about the resource.
Set up a VCN and Subnet
For each region where encodings should be run, a VCN and Subnet needs to be created. The OCID of the subnet is later needed to configure infrastructure objects on Bitmovin side (see section about how to configure your Bitmovin account).
For each of the following networking resources, make sure they are created in the new compartment that was created previously in step Set up a Compartment:
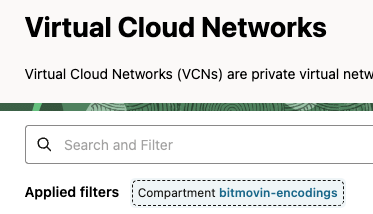
Select correct compartment under "Applied filters"
It is recommended to create a separate VCN + Subnet for each
OciAccountRegionSettingsinfrastructure object that is created on Bitmovin side.
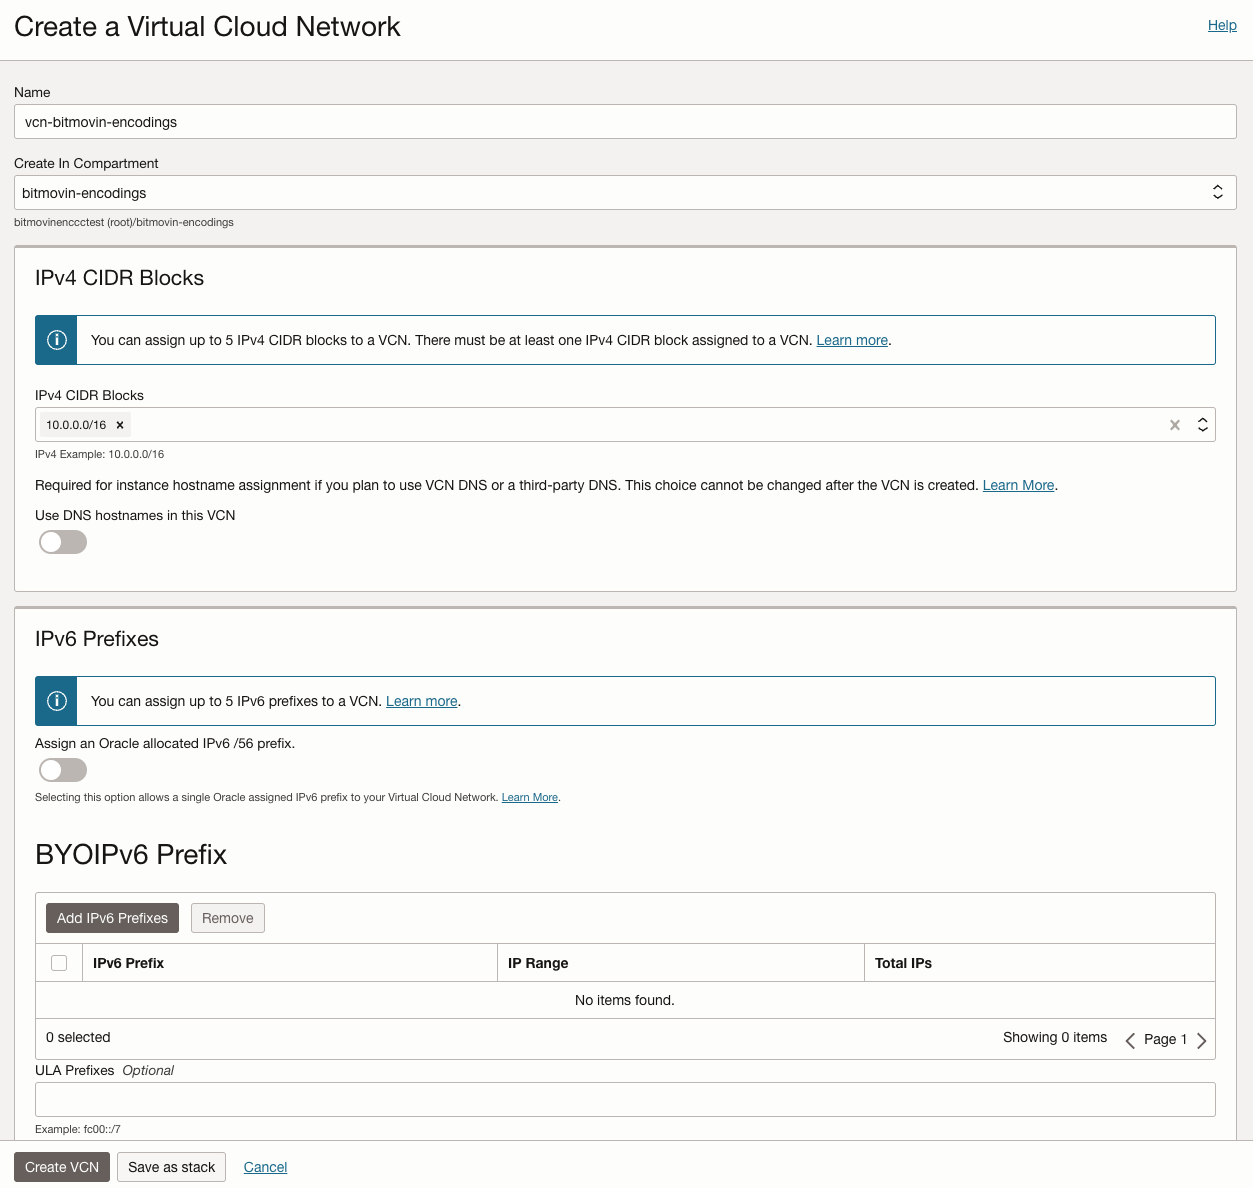
1.) Create a new VCN: "Networking" > "Virtual Cloud Networks" > "Create VCN"
- A IPv4 CIDR Block of
/16is recommended (The maximum allowed by OCI)
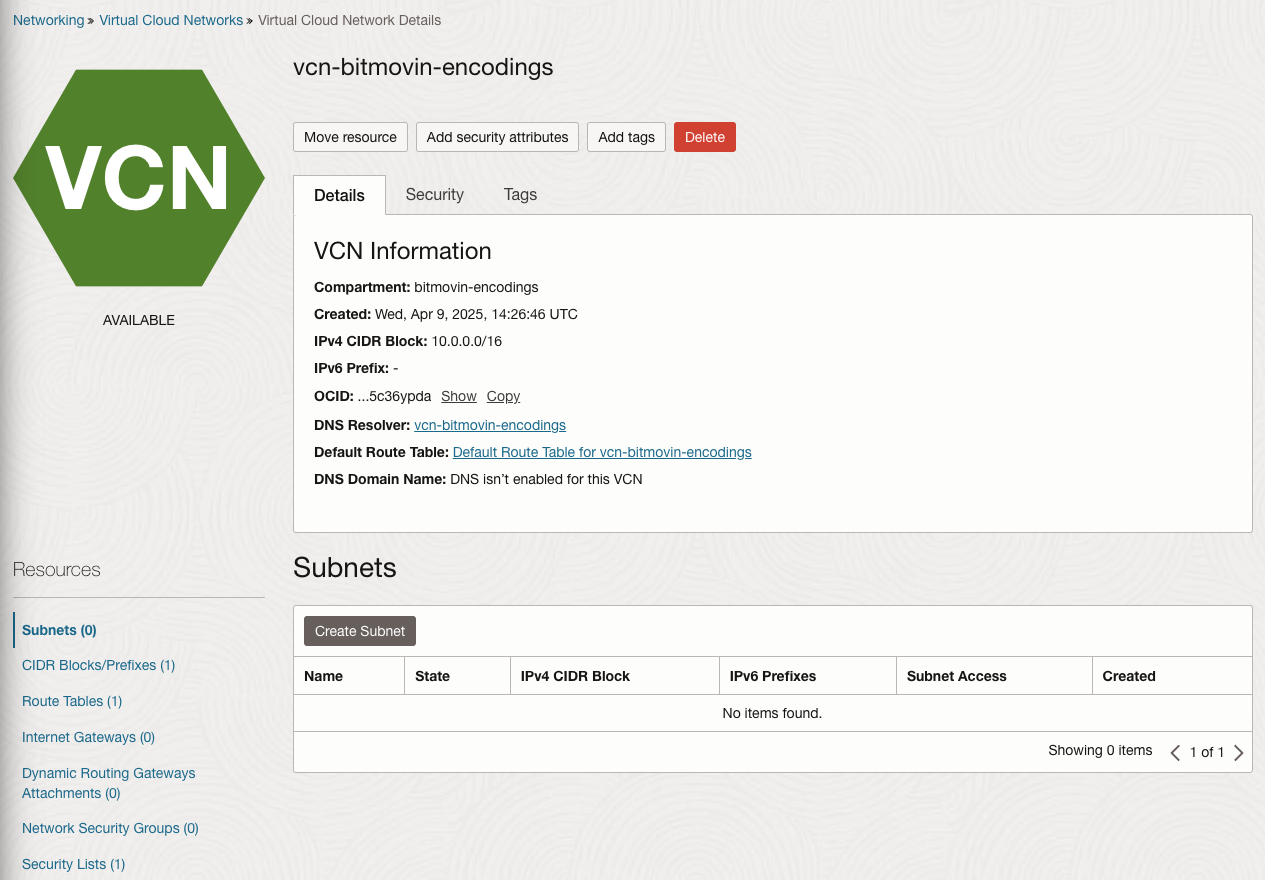
2.) Navigate into the newly created VCN
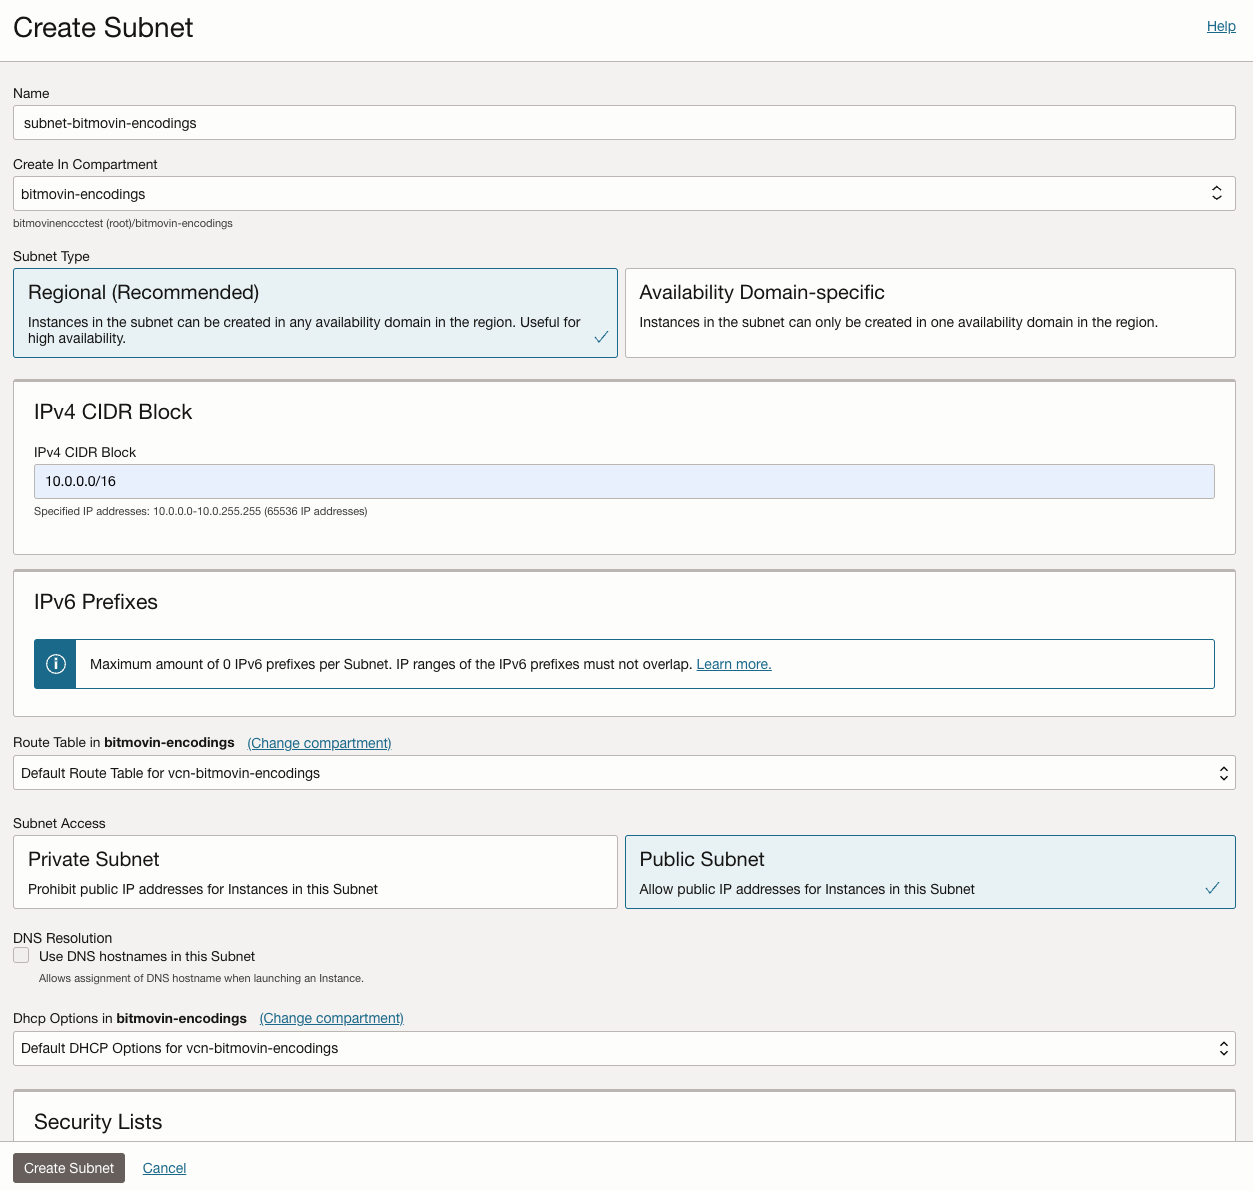
3.) Create a new Public and Regional (not Availability Domain (AD) specific) Subnet within the VCN: "Subnets" > "Create Subnet"
- A IPv4 CIDR Block of
/16is recommended
4.) Create a Internet Gateway for the newly created VCN: "Internet Gateways" > "Create Internet Gateway"
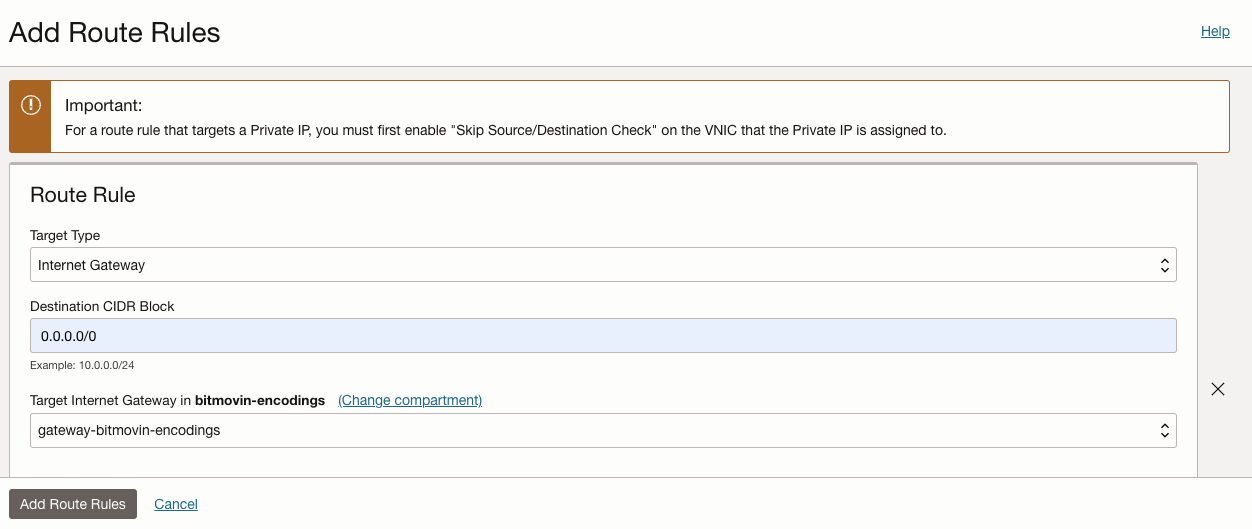
5.) Add a Route Rule to the still empty Default Route Table of the newly created VCN: "Route Tables" > "Default Route Table for ..." > "Add Route Rules"
- Destination CIDR Block:
0.0.0.0/0(allow all outbound internet traffic) - Target Type: Internet Gateway
- Target Internet Gateway: The newly created Internet Gateway
Set up Security (Firewall) Rules
To configure security rules, create a separate Security List within your VCN ("Security Lists" > "Create Security List") and add Stateful Ingress Security Rules based on the encoding requirements as outlined below.
This Security List needs to be added to the Subnet created in the previous section: Select the subnet and then "Add Security List".
The default Security List of the VCN already allows SSH ingress without source IP restriction. This rule can be deleted, if desired, as it will be made stricter with the rules below.
Using Network Security Groups (NSGs) to configure security rules is currently not supported for OCI Cloud Connect, due to technical limitations on Oracle side.
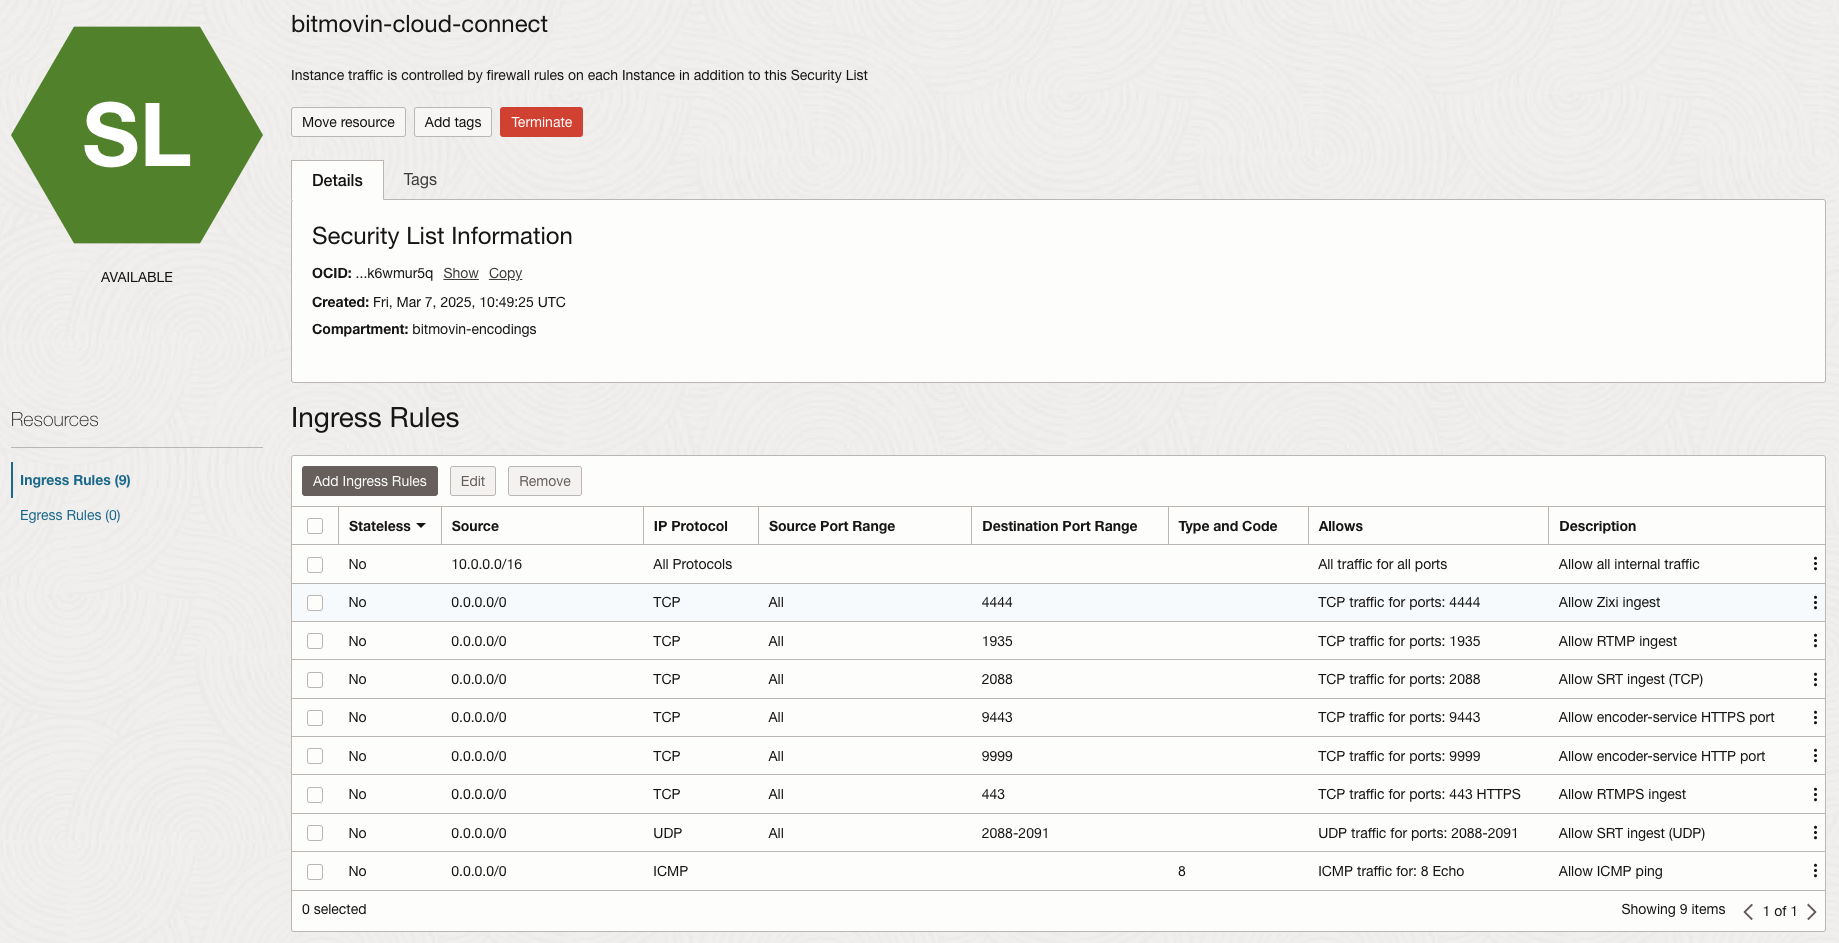
Generally Needed Security Rules
| Description | Source | Protocol | Source Port Range | Destination Port Range |
|---|---|---|---|---|
| Internal communication between instances | 10.0.0.0/16 (CIDR range of the subnet) | All Protocols | n/a | n/a |
| Allow SSH for incoming commands from the Bitmovin API to control the encoding. | 104.199.97.13/32 | TCP | All | 22 |
| 35.205.157.162/32 | TCP | All | 22 | |
| For incoming commands from the Bitmovin API to control the encoding. | 104.199.97.13/32 | TCP | All | 9443 |
| 104.199.97.13/32 | TCP | All | 9999 | |
| 35.205.157.162/32 | TCP | All | 9443 | |
| 35.205.157.162/32 | TCP | All | 9999 | |
| Allow ICMP ping | 0.0.0.0/0 | ICMP Type 8 | n/a | n/a |
Additional inbound rules for RTMP live streams
| Description | Source | Protocol | Source Port Range | Destination Port Range |
|---|---|---|---|---|
| Allow RTMP ingest | 0.0.0.0/0 | TCP | All | 1935 |
| Allow RTMPS ingest | 0.0.0.0/0 | TCP | All | 443 |
Additional inbound rules for SRT live streams
| Description | Source | Protocol | Source Port Range | Destination Port Range |
|---|---|---|---|---|
| Allow SRT ingest (TCP) | 0.0.0.0/0 | TCP | All | 2088 |
| Allow SRT ingest (UDP) | 0.0.0.0/0 | UDP | All | 2088-2091 |
Additional inbound rules for Zixi live streams
| Description | Source | Protocol | Source Port Range | Destination Port Range |
|---|---|---|---|---|
| Allow Zixi ingest | 0.0.0.0/0 | TCP | All | 4444 |
Configure your Bitmovin account
Before you continue, make sure you have collected the following information from your OCI tenancy:
- Tenancy ID
- The OCID of the tenancy where you intend to run encoding VMs. An admit policy needs to be correctly set up for this tenancy.
- Compartment ID
- The OCID of the compartment within the tenancy where you intend to run encoding VMs. An admit policy needs to be correctly set up for this compartment.
- Subnet ID
- OCID of the Subnet for encoding instances. Make sure the firewall rules were set up correctly as describe in the previous section.
It is important that the admit policy was set up correctly for the Tenancy ID and Compartment ID that are used to setup the infrastructure objects as described below. Otherwise, creating the infrastructure will fail.
Link your OCI tenancy
To enable your Bitmovin account to run encodings in your OCI tenancy, you need to link it using Infrastructure account and Region Settings objects.
- Open the Bitmovin Dashboard: https://dashboard.bitmovin.com/
- Go to "VOD/LIVE Encoding > Cloud Connect"
- Click the "Add infrastructure account" button, select the "Oracle Cloud Infrastructure" option, click the "Next" button
- Provide a "Name" of your choice for your project, fill in the Tenancy OCID and Compartment OCID, and click the "Next" button. If you get any errors, double check the entered OCIDs and the admit policy that was created earlier.
- Select the appropriate "OCI Cloud Region", fill in the Subnet OCID, click the "Next" button
Run encoding jobs in OCI
After configuration has been completed, you will be able to run encoding jobs in your own OCI tenancy. To do so, use the Bitmovin API client SDKs to submit encoding jobs, in the same way as you would do for encodings running in the Bitmovin Managed Cloud service. The only difference is that you need to specify the new infrastructure account instead of public cloud regions.
Here is a Python snippet demonstrating how to run an encoding in your OCI infrastructure:
# ID of the Infrastructure account that has been created
infra_id = ‘<infrastructure_id>’

# OCI region for which region settings have been created
infra_region = CloudRegion.OCI_EU_FRANKFURT_1
infrastructure = InfrastructureSettings(
    infrastructure_id=infra_id,
    cloud_region=infra_region
)

encoding = Encoding(
    name='oci connect encoding',
    cloud_region=CloudRegion.EXTERNAL,
    infrastructure=infrastructure,
    encoder_version='STABLE'
)
Sub Organizations
If you have set up your infrastructure in a sub organization, you must tell the Bitmovin API that you want to run the encoding in that sub organization. Thus, in addition to the code snippet above, make sure to set the tenant_org_id alongside the api_key in the bitmovin_api object:
# ID of the sub organisation you added the infrastructure to
organisation_id = '<sub_organisation_id>'

bitmovin_api = BitmovinApi(
    api_key=config_provider.get_bitmovin_api_key(),
    tenant_org_id=organisation_id,
    logger=BitmovinApiLogger()
)
Resource Quotas
The default OCI service limits are usually sufficient to run multiple encodings in parallel. If you have existing compartment quotas in place that restrict those service limits, please carefully review them in the Quotas page of the OCI Cloud Console to allow sufficient compute resources for encodings.
Bitmovin uses the VM.Standard.E4.Flex shape for encoding instances with 4 OCPUs and 16 GB of memory. The total amount of resources needed depends mainly on how many encodings are planned to run in parallel. We recommend to accommodate for a maximum of 60 instances per encoding.
Keep in mind that the number of instances needed for one encoding varies depending on the input file size and the number and data rate of the encoder representations. E.g. For Dolby Vision encodings and conversions, starting from Encoder v2.208.0, the maximum number of instances have been increased to 100 instances if the encodingMode configured is STANDARD (which currently maps to TWO_PASS), SINGLE_PASSor TWO_PASS, 200 instances if the encodingMode configured is THREE_PASS.
Updated 5 months ago