Managing your organization & team access
Managing your organization
When you create a Bitmovin Account via the Bitmovin Dashboard an organization is also created automatically and you become the owner of the organization.
You can access your organization details & settings via your profile:
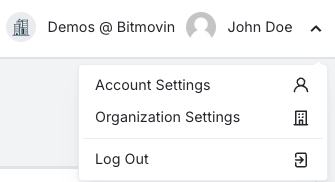
You will find your organization details & ID in your Organization Overview.

Terminology
- Bitmovin Account: When you sign up or get invited to an Organization via the Bitmovin Dashboard, an account is created for you. Each account is associated with an Organization.
- Organization: An Organization holds all the resources you can create in the Dashboard or through the Bitmovin API (Encodings, Inputs, Outputs, Configurations, Manifests, etc.), as well as the subscriptions for each of our services. Furthermore, one or more Users can be part of an Organization.
- User (Owner, You): A User is by default the owner of the Organization of its own Bitmovin Account.
- Group: A Group has specific Permissions assigned to it to control which actions its members can perform in an Organization.
- User: A User can become a member of other Organizations by being added to one or more of its Groups. Users that are added to other Organizations are also referred to as Tenant-Users.
- Permissions: Permissions can be assigned to Groups to control what resources its members are allowed to View or Manage inside an Organization.
Managing your team
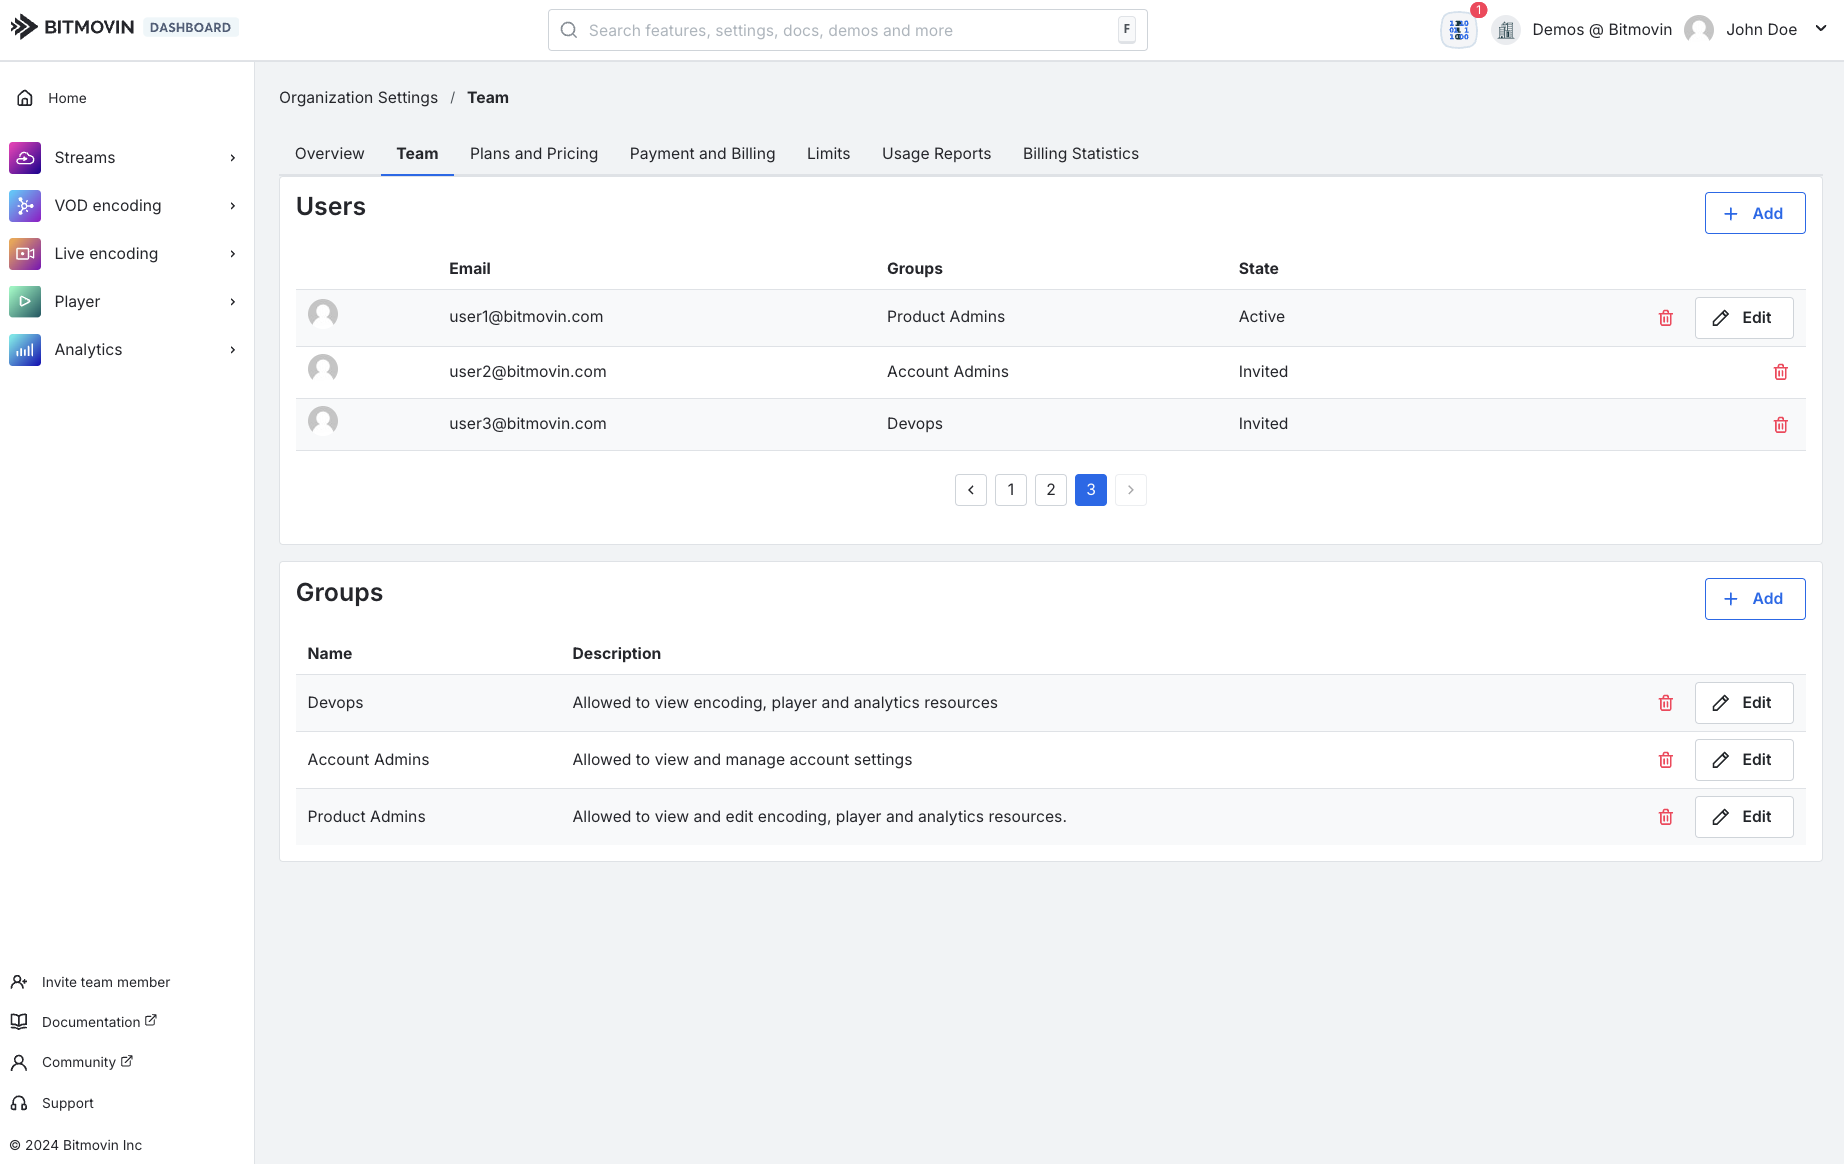
Via your organization's team settings you can invite additional users to the Bitmovin Dashboard and also manage their access by adding them to groups and defining group permissions.
Inviting team members
Invite your team members by clicking the + Add button next to "Users":
Enter the email(s) of the user(s) you want to add to your organization and specify the groups you want to add them to and eventually click Save:
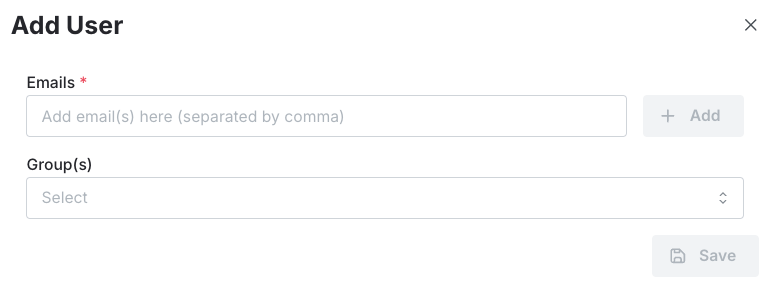
The users you have invited will receive an email and once they've created their account they can select your organization in the top menu bar and switch to it.
If the account already exists, they can just log in and select the correct organization in the top menu bar.
Managing groups
By default, there are three predefined groups available:
| Group | Description |
|---|---|
| Devops | Allowed to view Encoding, Player, and Analytics resources |
| Account Admins | Allowed to view and manage account settings |
| Product Admins | Allowed to view and manage Encoding, Player, and Analytics resources |
Creating new groups
If none of the predefined groups fits your needs, you can create a custom group with custom permissions. In order to create a custom group, go to your Team settings, and click on the + Add button next to Groups:
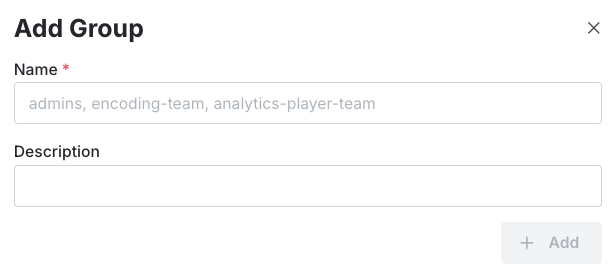
TipWe recommend to use a descriptive name and description, so it is easy to see what set of permissions are configured for this group. By default, if no permissions are added to a group everything will be denied. So, by adding permissions you can allow specific actions that users of this group can perform.
Group permissions
To manage group permissions, go to your Team settings and click on the Edit button next to the group name and description.
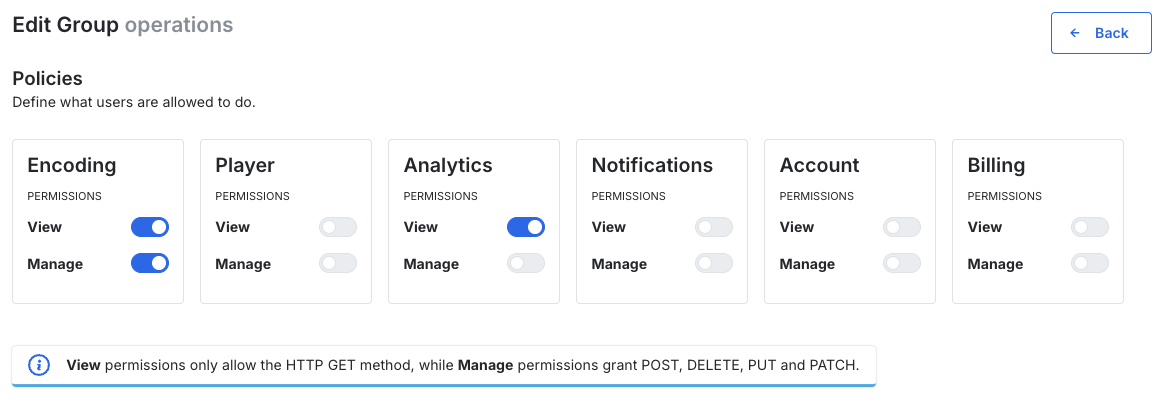
Permission levels & available policies
The following permission levels are available:
| Permission level | Description |
|---|---|
| View | Allows to view the resources only (API SDK: only GET Requests) |
| Manage | Allows to create/edit/delete resources (API SDK: only POST/PUT/DELETE/PATCH Requests) |
Available Policies
- Encoding - Control access to all encoding related resources and its APIs
(VoD/Live/PerTitle Encodings and Object Detection, Configurations, Inputs, Outputs, Filters, Manifests, Infrastructure, Statistics) - Notifications - Controls access to email- and Webhook notifications for encoding events and its APIs
(Email, Webhook) - Player - Controls access to all player related resources and its APIs
(Licenses, Statistics) - Analytics - Controls access to all analytics related resources and its APIs
(Licenses, Queries, Metrics) - Account - Controls access to Bitmovin Account related areas
(Account Settings, Organization Settings) - Billing - Controls access to all billing and subscription related areas
(Subscriptions, Payment Methods, Billing Information Details)
Updated 11 days ago