Using Google DFP Video Ads
Overview
This tutorial provides a step-by-step guide for making use of Bitmovin’s advertising support for DFP video ads and VAST/VPAID in your application. It covers solutions for video advertising across all platforms, including mobile video advertising, through the Bitmovin HTML5 Player. The solution uses VAST, VPAID and Google DoubleClick for Publishers and can be used to deliver a wide variety of ad types including pre-roll ads. The ad tag(s), created within this guide, will be built on DFP Ad Units. An introduction to Ad Units, as well as more detailed information and how they can be created, can be found in the DFP Small Business Help Center.
Generating Ad Tags, using Google DFP
Once one or more Ad Units have been created, they can then be used to generate the ad tag, which will be needed for the player configuration later on. To do so, login to the DFP Admin Console and switch to the Generate tags page, like shown in the screenshot below.
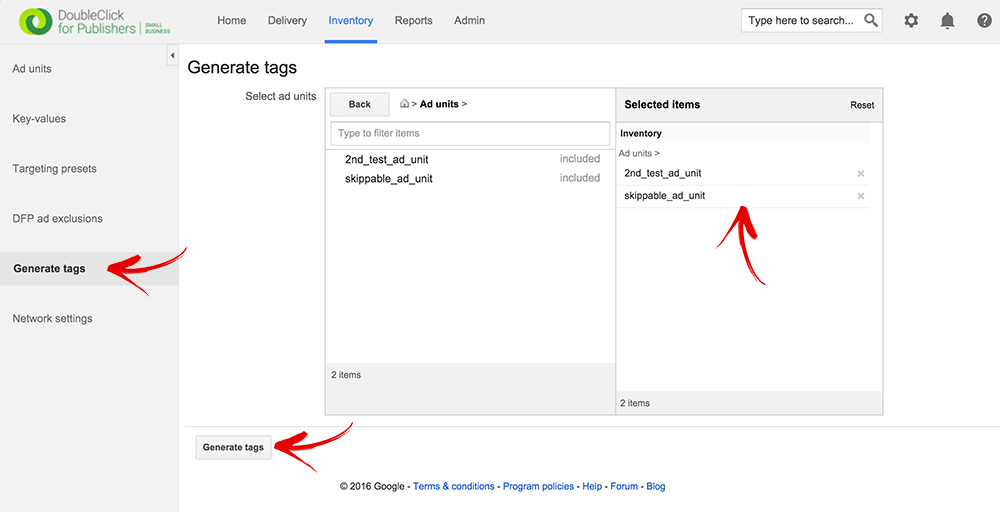
As you can see, we’ve selected two different Ad Units, which we will use for a pre- and mid-roll ad, respectively. In general you can use as many Ad Units as needed for your use case. It is possible to both group them (e.g.playing two pre-roll ads before the actual video) or to use them separately at different points in time. In the next steps you will be asked to choose the tag type; we recommend to use ‘Google Publisher Tag’ for now, and step over the tag options. In the final view of the wizard the ad tag(s), corresponding to the selected Ad Unit(s) will be generated, as shown in the screenshot below.

The example shows the paths to the two tags, which we will use in the player configuration later on. Notice that three of the query parameters are covered by placeholders and should be replaced with the dedicated values.
'https://...&url=[referrer_url]&description_url=[description_url]&correlator=[timestamp]'The url parameter indicates the address of the page where the ad will appear. So, in our case we use https://www.bitmovin.com. Please note, that the URL should be single-encoded. The description_url is the URL of the page that contains the player that is making the request; we use https://www.bitmovin.com as well. The last parameter, named correlator indicates a random number, typically the timestamp of the page view. Considering the above, the query parameters will be:
'https://...&url=https://www.bitmovin.com&description_url=https://www.bitmovin.com&correlator=1454061748879'More information about ad tags and how the URL is compounded can be found in the related documentation.
Player Setup and Ad Related Configuration Options
Now, it’s time to prepare the player and point it to the generated tags. The Bitmovin Adaptive Streaming Player utilizes the browser built-in HTML5 Media Source Extensions (MSE) to playback multimedia content natively through the browser decoding engine.
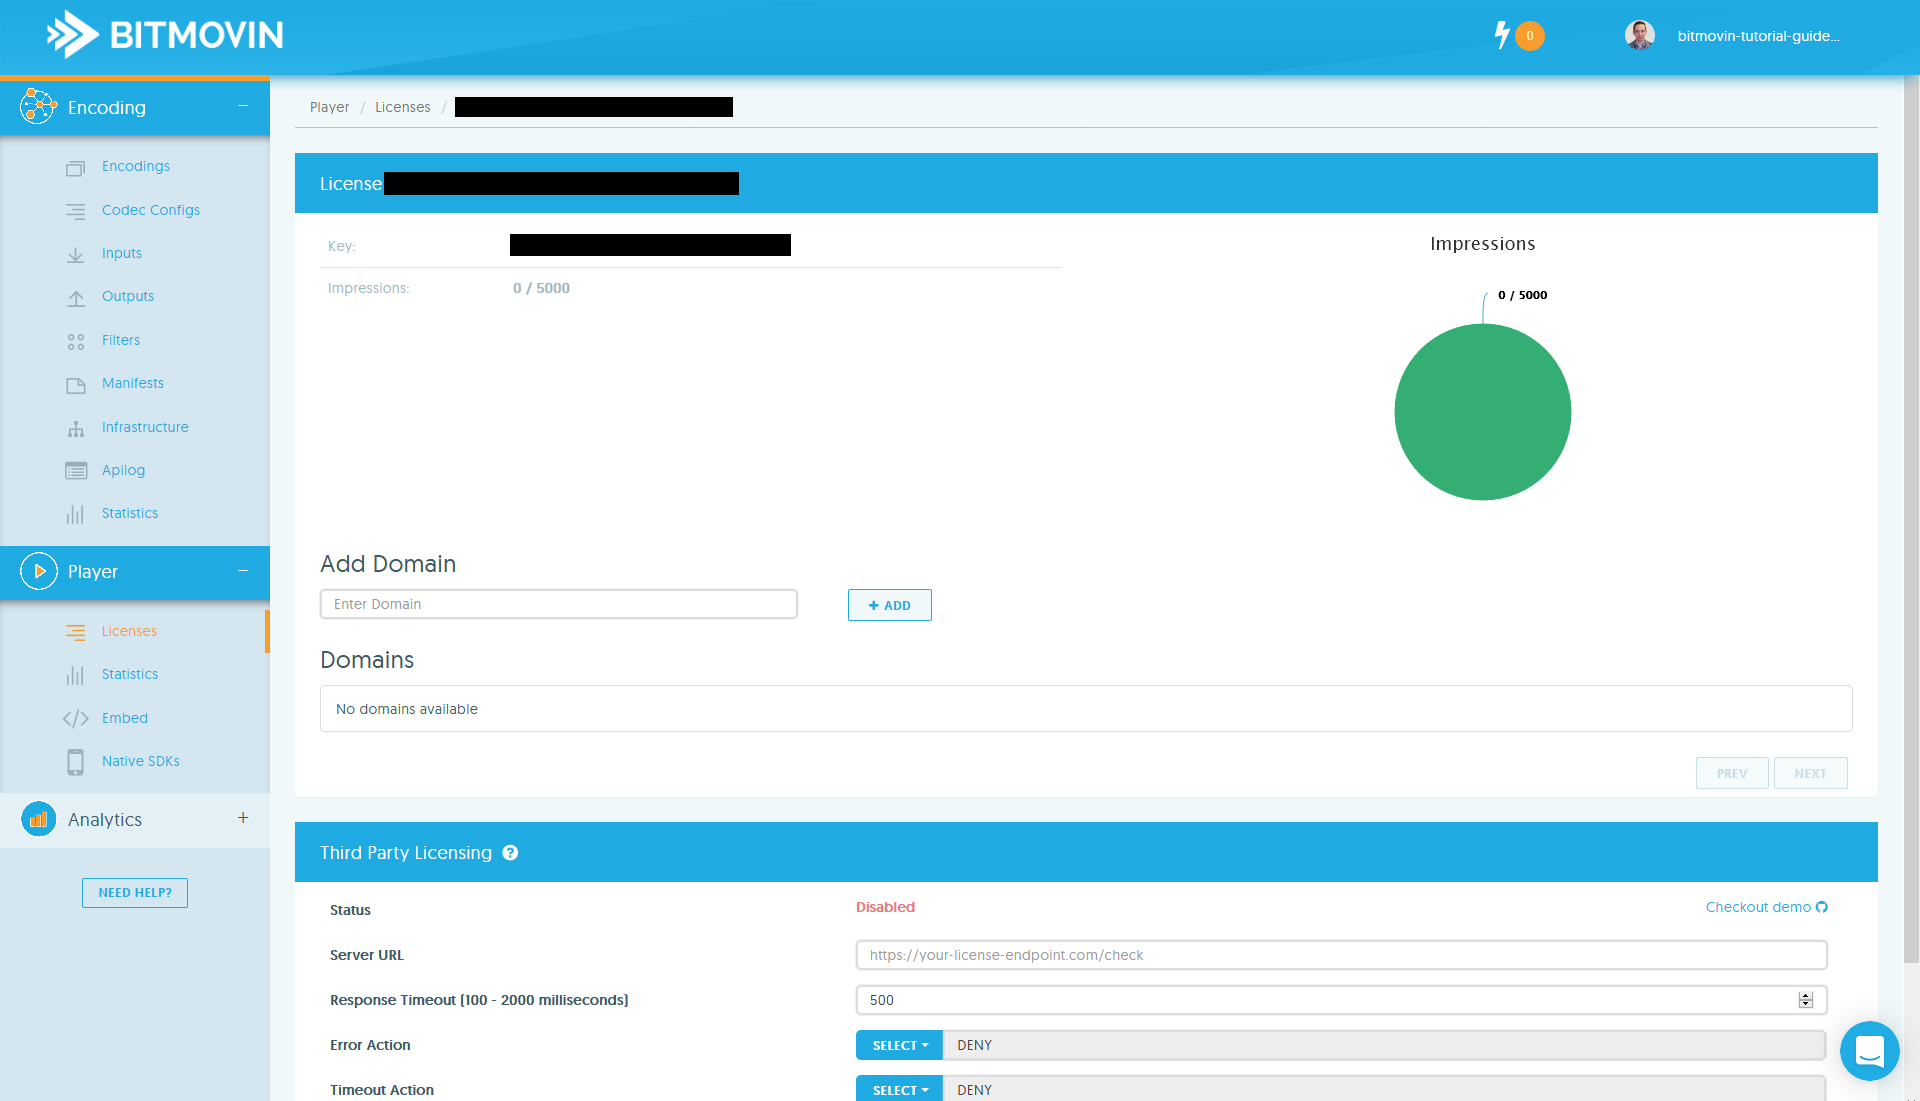
To get an overview of all relevant information in context of the player, click on the player overview menu item. As you can see in the above screenshot, the overview shows your personal player key, the CDN path of the player files and how many impressions have already been generated this month. You can test our fully featured player for free during 30 days and up to 5,000 impressions. For testing and evaluation purposes, video views on localhost does not increase the impressions count. You can also use the player on multiple domains, just add them to the list of approved domains. To add a domain, enter the domain name and click the ‘+Add’ button, as indicated in the figure below.

In the ‘Embed’ tab of the player part, you can download a prepared code snippet, and use this to embed the player in an existing page (or simply download a pre-configured sample page). Regardless of which option you prefer, the player configuration will be the same. You can point the player to any MPEG-DASH and/or HLS stream, by changing the source part of the configuration object of the player. To generate MPEG-DASH and HLS content, you can simply use our cloud based encoding system.
A simple configuration, using just one pre-roll ad sequence in combination with a DASH stream might look as below:
var conf = {
    key: 'YOUR-KEY-HERE',
    source: {
        dash: 'https://path/to/your/stream.mpd'
    },
    advertising: {
        client: 'vast',
        tag: 'http://your.ad.provider/manifest.xml'
    }
}
The key attribute takes the player license key from the player overview tab, the used DASH manifest is referenced by the DASH tag. The additional advertising attribute includes different advertising related options, which are explained in more detail in our online documentation.
Within this tutorial, we want to make use of a VAST based pre-roll ad and one additional VPAID mid-roll ad after 50% of the video has been played. The above config contains only one ad manifest, which will be played as pre-roll ad, as no other information is specified. To achieve the desired behavior, the advertising block has to be modified as follows:
var conf = {
    key: 'YOUR-KEY-HERE',
    source: {
        dash: 'https://path/to/your/stream.mpd'
    },
    advertising: {
        admessage: 'This ad will end in xx seconds',
        schedule: {
            'pre-roll-ad': {
                client: 'vast',
                offset: 'pre',
                tag: 'https://link.to.adserver.com/vast/preroll/ad/admanifest.xml'
            },
            'mid-roll-ad': {
                client: 'vpaid',
                offset: '50%',
                tag: 'https://link.to.adserver.com/vpaid/midroll/ad/admanifest.xml'
            }
        }
    }
}
Updated 6 months ago